If you’re dealing with rough, cracked, or uneven concrete surfaces around your home or commercial space, applying a skim coat might be the ideal solution to achieve a clean, polished, and even finish. Skim coating concrete is not only cost-effective, but it’s also a highly efficient technique that professionals and handy DIYers alike can use to enhance both the aesthetic appeal and structural integrity of concrete surfaces. Whether you’re refreshing a dull garage floor to create a sleek, modern surface or preparing an old patio for a new finish that’s ready for entertaining guests or hosting outdoor meals, skim coating offers a reliable path to improvement.
What Is Skim Coating Concrete?
Skim coat concrete refers to a very thin, smooth layer of cementitious material applied over existing concrete. The mixture typically includes cement, fine sand, and a polymer-modified bonding agent, which gives it strong adhesion and flexibility. This layer is designed to smooth out imperfections and create a uniform surface that can be painted, sealed, or used as a base for tile and other finishes.
This resurfacing solution is particularly valuable for rejuvenating aging concrete. It fills in small cracks and pitting, and masks discolorations or stains that can make concrete look old and worn. filling in small cracks and pitting, and masking discolorations or stains that can make concrete look old and worn. It also improves the performance of the surface by providing a new, clean substrate that is resistant to wear and easier to maintain.
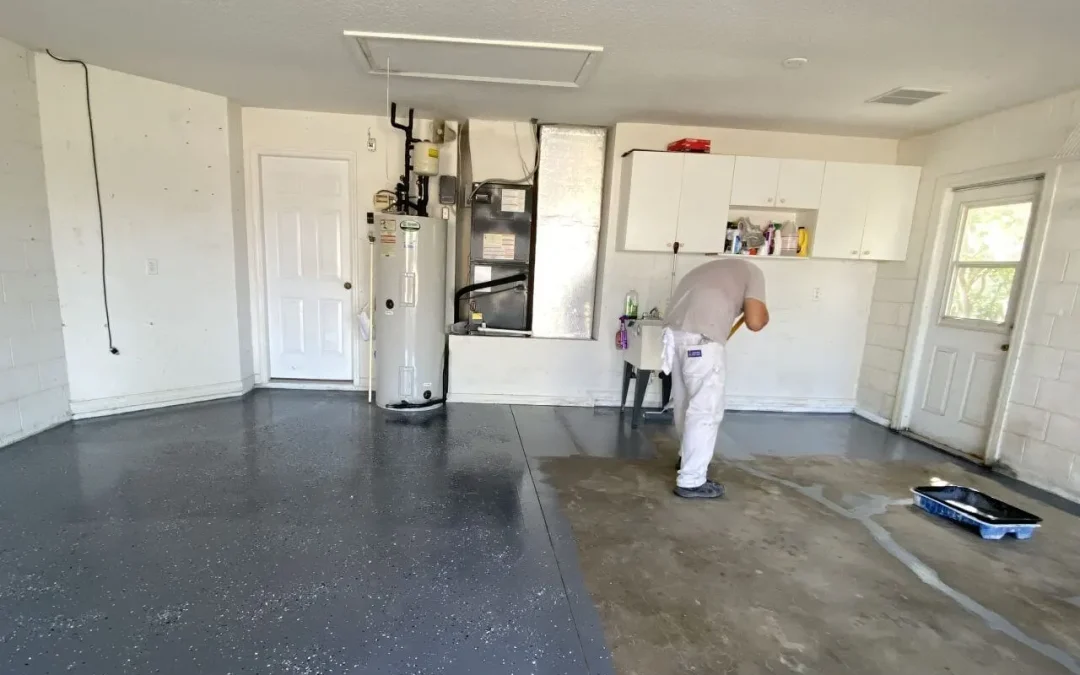
Learn more: Dust removal an painting of Concrete floors in the garage
When Should You Use a Skim Coat on Concrete?
There are many scenarios where a skim coat can be extremely beneficial. It is commonly used for:
- Smoothing out rough or uneven concrete slabs in residential, commercial, or industrial settings
- Concealing imperfections such as minor cracks, surface pitting, spalling, or staining
- Preparing surfaces for the installation of new flooring materials like tile, vinyl, carpet, or epoxy coatings
- Enhancing the appearance of driveways, sidewalks, patios, pool decks, and other outdoor concrete areas
- Renovating older concrete to extend its life without a full replacement
If your concrete surface is structurally sound but cosmetically unappealing or slightly damaged, skim coating can be a fast and effective fix. It’s also a great choice when you want a smooth, modern look with minimal construction mess or downtime.
Concrete resurfacing before and after:
Tools and Materials You’ll Need
Before you begin a skim coating project, it’s essential to gather the proper tools and materials to ensure a smooth and successful application. Each tool plays an important role: a broom, vacuum, or blower removes loose debris to help the skim coat adhere properly; a pressure washer ensures deep cleaning, especially for outdoor surfaces; the skim coat mix or resurfacer provides the actual leveling layer; a mixing bucket and drill with a paddle attachment help achieve the right consistency; trowels or squeegees allow for even application; crack repair tools prep damaged areas beforehand; painter’s tape and plastic sheeting protect nearby finishes; and safety gear keeps you protected throughout the process. to ensure a smooth and successful application. Here’s what you’ll typically need:
- Broom, vacuum, or blower (for initial cleaning)
- Pressure washer (especially important for exterior concrete)
- Skim coat mix or concrete resurfacer
- Mixing bucket and a heavy-duty drill with a mixing paddle attachment
- Finishing trowel, squeegee, or magic trowel
- Putty knife or crack repair filler (for pre-repairing large cracks)
- Painter’s tape and plastic sheeting (to protect adjacent surfaces)
- Protective gear: gloves, safety glasses, mask, and knee pads
How to Skim Coat Concrete: Step-by-Step Guide
- Surface Preparation: Begin by thoroughly cleaning the concrete surface. Remove any dirt, grease, oil, loose debris, or flaking paint. Use a pressure washer for deep cleaning, and allow the surface to dry completely. Repair large cracks or damaged areas with patching compound to ensure the surface is ready to accept the skim coat.
- Mixing the Skim Coat Material: In a large bucket, mix the skim coat product according to the manufacturer’s instructions. Use a drill with a mixing paddle to ensure an even consistency. The mixture should be lump-free, smooth, and slightly thick—not watery.
- Applying the Skim Coat: Starting at one corner of the surface, pour or spread a portion of the skim coat material onto the concrete. Use a trowel or squeegee to evenly spread the mixture across the surface, working in manageable sections. Be sure to apply consistent pressure for an even finish.
- Smoothing and Leveling: As you work, smooth out any lines or ridges using the edge of the trowel. If you’re applying a second layer, wait for the first to partially set (but not fully cure) to maintain good adhesion.
- Drying and Curing: Allow the skim coat to dry and cure fully. Environmental conditions like humidity, temperature, and airflow can significantly affect curing time and quality. For best results, avoid applying in direct sunlight or during rainy conditions, and consider using fans or dehumidifiers in enclosed spaces to help maintain optimal drying conditions. This process can take anywhere from 24 to 48 hours, depending on the weather, temperature, and humidity levels. Avoid heavy foot traffic during this time.
- Optional Sanding and Sealing: Once dry, you can lightly sand the surface to correct any imperfections. Apply a concrete sealer to protect the surface from moisture, staining, and wear. Sealing is especially important for outdoor applications.
Benefits of Skim Coating Concrete
Skim coating offers numerous benefits, making it a popular choice for residential and commercial renovations:
- Cost-effective renovation solution compared to tearing out and replacing old concrete
- Improves surface aesthetics by creating a clean, smooth look
- Extends the life of the existing concrete by sealing and protecting it from further wear
- Ideal base for decorative finishes, paint, tile, or epoxy coatings
- Quick turnaround time with minimal mess
- Versatile enough for both indoor and outdoor use
Common Mistakes to Avoid When Skim Coating Concrete
While skim coating is generally straightforward, certain mistakes can compromise the final results. Be sure to avoid the following:
- Applying skim coat to a dirty, oily, or damp surface, which can cause adhesion problems
- Improper mixing, such as using the wrong water ratio or failing to mix thoroughly
- Skipping necessary repairs, which can cause the skim coat to crack or fail
- Applying the product too thickly, leading to shrinkage and cracking
- Not allowing sufficient curing time before applying finishes or walking on the surface
- Failing to seal the surface, especially in moisture-prone areas
Skim coating is a versatile and accessible way to upgrade tired or unsightly concrete surfaces. Compared to other resurfacing methods like full concrete replacement or installing overlays, skim coating is quicker, less labor-intensive, and far more budget-friendly—making it an excellent option for most property owners. Whether you’re restoring your garage floor, brightening up a patio, or prepping a basement for a new floor installation, skim coat concrete is a practical and attractive solution. By taking the time to properly prepare, apply, and cure the skim coat, you can achieve a smooth, professional-looking finish that adds value and durability to your property.
Ready to give your concrete a fresh start? At Local Painter Florida, we specialize in transforming dull and damaged concrete with expert skim coat concrete services. Contact us today for a free estimate and consultation tailored to your unique project needs.
Ask for expert help! We are happy to help you with interior and exterior wall painting and floor renovation of family homes and vacation homes in the Saint Augustine area!
Call for a free quote! 1(904) 217-9681 – Peter Hando