Proper wall preparation is essential if you plan to renovate or paint a room. After all, the goal is to have a nice, even, and clean wall surface by the time the painting is finished. However, the perfect finish depends on several factors, one of which is the current condition of the walls. In this article, we’ll cover everything you need to know about repairing and preparing walls before painting.
Check The Condition Of The Walls Before Painting
It’s essential to take the condition assessment that’s typically recommended before painting seriously. You need to be able to look at the conditions of the walls before painting to create the right finished look.
For example, this is particularly important when buying a property where you may not know exactly what renovations have been done in the past. If the walls have been painted many times, it’s uncertain whether it’s safe to apply new coats. Instead, you’ll need to remove the thickened layer or paint completely after 4-5 coats of paint. It can be tedious, but by doing this, you can be sure that the new paint won’t pick up patches of the underlying layers.
Cracks, Damages, And Water Ingress Should Be Expected
Always check for any significant damage, cracks, loose or peeling layers, discoloration, or mold stains that may indicate soaking. If you experience any previous soaking spots or mold, this needs to be appropriately treated to make it disappear completely. Investing in a simple paint job without treating this condition will not cover the yellowish-brown discoloration. I previously wrote about this in detail in this article, “WE HAVE A LEAK!“.
How to repair walls before painting?
Next, tap the wall surface! If you suspect that there’s a loose layer, scrape the surface with a spatula. Again, it’s much better to find out before painting that there’s an issue rather than while you’re working.
If you apply the paint to a wall in poor condition, the moisture may cause the previous layers of paint to peel off with the roller, and the plaster may peel off in patches. This not only means that the surface will be unsightly but also that the painting cannot be continued in this condition. Instead, the preparatory work will have to be started all over again.
How Can I Remove Old Paint From The Wall?
In short: You’ll want to sand, dust, smooth, deep prime, and finally paint the wall. This is the recommended sequence to get a beautiful-looking wall. With these preparatory operations, you can fix the wall and make it even again before painting.

If you need to scrape off old layers of paint, this should be preceded by a thorough dampening of the wall. Make sure to complete this step before any repainting to remove any surface contaminants. Once the thick layer of paint has been loosened, you can easily peel it off the wall with a wide spatula.
To do this, hold the spatula at an angle of 30-50 degrees and apply medium pressure to the surface to remove the paint. Next, loosen and remove stubborn stains by wetting more vigorously. After drying, sanding is next. Make sure to use sandpaper that can be held on a large surface with a smoothing pad and handles. The operation should be carried out with gentle strokes and frequent wiping of the sheet.
How Can I Repair Damaged Paint On My Wall?
In order to repair damaged paint on your wall, you’ll have to scrape the cracks deep, widen them and wet them. Once that’s finished, you’ll have to fill the gaps with glue. Next, sand the repaired areas to match the plane of the wall, and after dusting, you can start the deep foundation of the walls of the room. This is important because the agent will both consolidate the loose surface grains of the wall and reduce the absorbency of the walls.In addition to preparing your walls properly before painting or renovating, you may also want to read my previous article on things to consider before your painting project.
Prepare wall for painting – step by step
When it comes to achieving a flawless paint job, repairing and preparing your walls is of utmost importance. Follow these steps to ensure your walls are in prime condition for painting:
1. Assessing the Wall Surface
Before diving into any repairs, carefully inspect the wall surface for any visible damage or imperfections. Look out for cracks, holes, peeling paint, or water damage. Identifying these issues will help you determine the extent of repairs needed.
2. Gathering the Necessary Tools and Materials
To repair and prepare your walls, gather the following tools and materials:
- Putty knife
- Sandpaper (medium and fine grit)
- Spackle or joint compound
- Patching compound
- Primer
- Painter’s tape
- Drop cloths
- Cleaning solution
- Paintbrushes and rollers
- Stir sticks
Having these items on hand will make the process smoother and more efficient.
3. Patching Holes and Cracks
Once you’ve identified any holes or cracks on your walls, it’s time to patch them up. Follow these steps:
- Clean the damaged area using a cleaning solution and allow it to dry completely.
- Apply spackle or joint compound to the hole or crack using a putty knife. Smooth it out evenly, slightly overfilling the damaged area.
- Allow the patch to dry according to the manufacturer’s instructions.
- Sand the patched area using medium-grit sandpaper until it’s smooth and blends seamlessly with the wall surface.
- Wipe away any dust with a clean cloth.
4. Repairing Water Damage
Water damage can leave unsightly stains and weaken the structure of your walls. Here’s how to repair water-damaged walls:
- Identify and fix the source of the water leak to prevent further damage.
- Remove any loose or flaking paint from the affected area.
- Apply a coat of stain-blocking primer to seal the water stains and prevent them from bleeding through the paint.
- Fill any cracks or holes using patching compound and follow the same process as mentioned in Step 3.
- Sand the repaired area until it’s smooth and level with the surrounding wall surface.
- Clean the area and remove any dust before moving on to the next step.
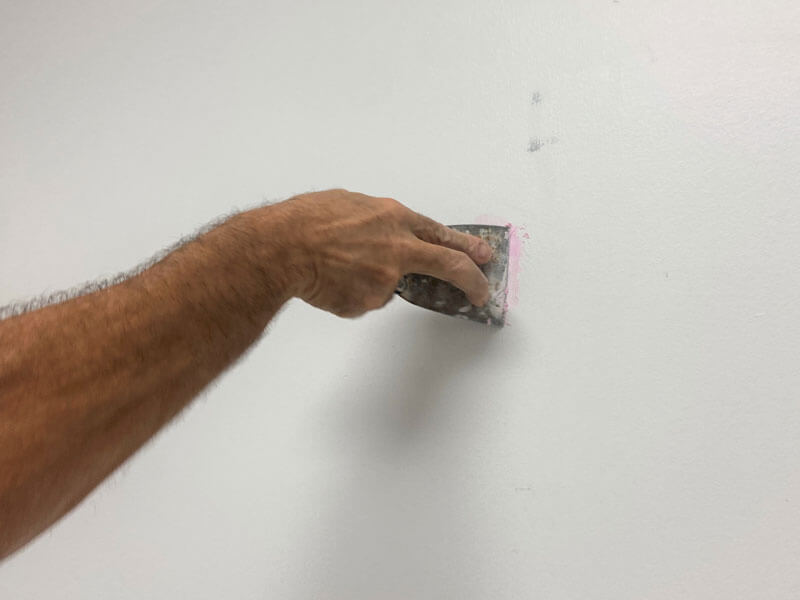
5. Sanding the Walls
Sanding the walls is a crucial step to ensure a smooth and even paint finish. Here’s how to do it effectively:
- Start by using medium-grit sandpaper to remove any bumps, rough patches, or texture on the walls.
- Sand in a circular motion, applying even pressure.
- After you’ve achieved a smooth surface, switch to fine-grit sandpaper to further refine the wall’s texture.
- Wipe away any dust using a clean cloth or vacuum cleaner.
6. Cleaning the Walls
Properly cleaning the walls is vital to remove dirt, dust, grease, or any other substances that could affect the adhesion of the paint. Follow these steps to ensure a clean surface:
- Start by removing any loose dirt or cobwebs using a soft-bristle brush or a vacuum cleaner with a brush attachment.
- Fill a bucket with warm water and add a mild detergent or wall-cleaning solution.
- Dip a sponge or a clean cloth into the soapy water and gently scrub the walls, working from top to bottom.
- Pay extra attention to areas that are prone to dirt buildup, such as kitchens or bathrooms.
- Rinse the walls with clean water to remove any soap residue.
- Allow the walls to dry completely before proceeding to the next step.
7. Applying Primer
Priming your walls before painting is essential for several reasons. Primer helps to:
- Provide a uniform surface for paint application
- Improve paint adhesion
- Seal porous surfaces
- Prevent stains from bleeding through
Follow these steps to apply primer:
- Protect areas you don’t want to prime with painter’s tape and drop cloths.
- Stir the primer thoroughly using a stir stick.
- Using a paintbrush or a roller, apply an even coat of primer to the walls, working in sections.
- Start with the edges and corners, using a brush, and then fill in the larger areas with a roller for a smooth finish.
- Allow the primer to dry according to the manufacturer’s instructions before moving on to the next step.
Conclusion – How to fix walls before painting?
While you can tackle this project on your own, it may turn out to take a lot longer and require a lot more work than expected. If you’d rather leave the assessment, repair, and painting of your walls to a professional, call us. 1(904)217-9681
I perform a quick on-site survey with my team and give you a personalized quote in no time for your planned restoration.
I work quickly and reliably! I will quickly take care of your indoor painting needs with quality materials and more than 10+ years of experience!
Related blog aritcles: Three Steps to a Successful Home Renovation
Wall Painting Tools And Equipment – What You Will Need For Interior Wall Painting
How Can I Clean Walls With Flat Paint?
Paint Sprayer vs Roller? Pros and cons
How long to paint a house interior?
Covering and Protecting Before Painting
Frequently Asked Questions
- How long should I let the repaired areas dry before painting? It’s best to follow the manufacturer’s instructions on the patching compound or spackle you used. Typically, it takes 24 hours for the repair to dry completely.
- Can I skip the priming step? While it may be tempting to skip priming, it’s not recommended. Priming ensures better adhesion and durability of the paint, resulting in a professional finish.
- Do I need to sand the walls if they are already smooth? Yes, sanding is still necessary even if the walls appear smooth. It helps to create a slightly rough surface, allowing the paint to adhere better.
- Should I clean the walls again after sanding? Yes, it’s crucial to remove any dust or debris after sanding. Use a clean cloth or a vacuum cleaner to ensure a clean surface for painting.
- Can I use any cleaning solution for wall cleaning? It’s recommended to use mild detergent or a wall-cleaning solution. Harsh chemicals can damage the wall surface or affect paint adhesion.
- How long should I wait after priming before applying paint? Refer to the manufacturer’s instructions on the primer for the recommended drying time. Generally, it takes around 1-2 hours for the primer to dry.